Pressure relief valve disabling
Written by Ben
Last updated on 2008-01-13
Important information
The pressure relief valve is a safety feature that prevents over-pressurization (pumping too much). However, when doing some power modifications such as the K-mod or Colossus, this valve is activated even when the pressure is not too high. On air pressure water guns, the only way to get higher pressures is to remove this valve. Removing this valve removes a safety feature, but, it allows for higher pressures in the water gun. This modification should be performed ONLY when it is required to be performed. This modification does not increase performance by itself in any CPS water gun. This modification alone only increases performance in air pressure water guns because there is no pressure limit any longer. Again, it removes a safety feature, and developing a pressure crack due to the pressure being too high becomes a very real possibility.
If the water gun you have pumps water, read the separate PC valve removal section below. Water guns that pump water have a separate pressure chamber. They include all CPS water guns and all of the XP and Max-D water guns that have a separate pressure chamber.
If you water gun pumps air like most small Max-Ds, XPs, and recent water guns under different names, follow the pressurized reservoir valve removal guide below.
If you have a Storm pistol water gun, follow the Storm valve removal guide below.
Separate PC valve removal
To disable this valve, you will essentially have to locate it, cut it out, and fill in the holes. That's the entire modification in a nutshell.
Identifying the valve and where to cut
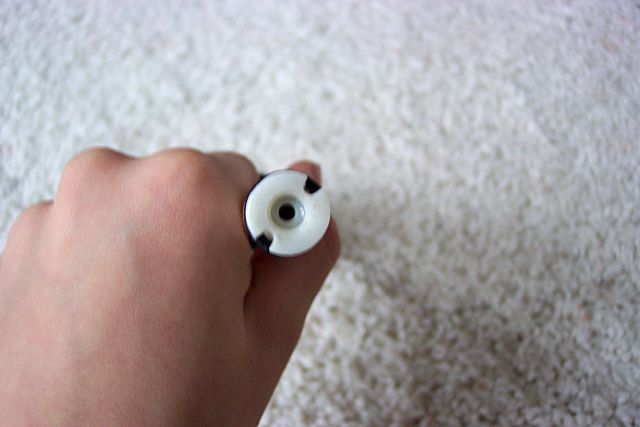
The pressure relief valve is located at one end of the pump near the water reservoir. There are two major types of pressure relief valves. Type A is found in most every water gun made past 2004 and the CPS 2700, CPS 2500, CPS 2000, CPS 1500, CPS 1700, and Max-D 6000, among others. Type B is found in the CPS 1000, CPS 1200, CPS 2100, CPS 1-3-5, and CPS 4100. If you are having difficulty identifying where to cut, feel free to post at the SSC forums with your gun's name and an image of the valve assembly. We'll tell you where to cut.

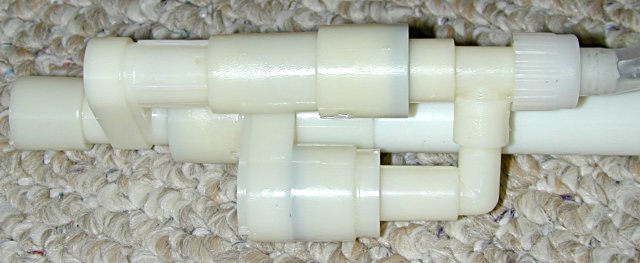
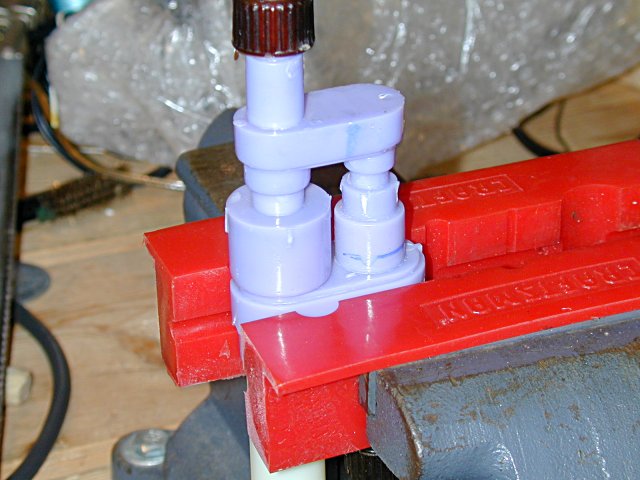
The image above is a type A pressure relief valve from a CPS 2700. The area between the lines on the valve above is the pressure relief valve. That area must be removed and the holes created must be filled in.
The valve above is a type B valve from a CPS 2100.
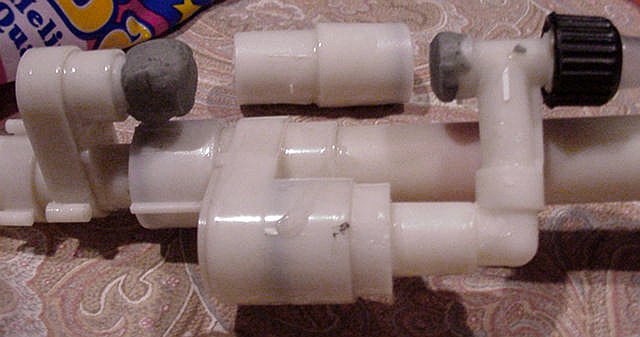
This type B valve from a CPS 1200 shows where the cuts should be made.
The valve above is from an Arctic Blast. It is a type A valve, but you do not need to do any cutting to disable it.
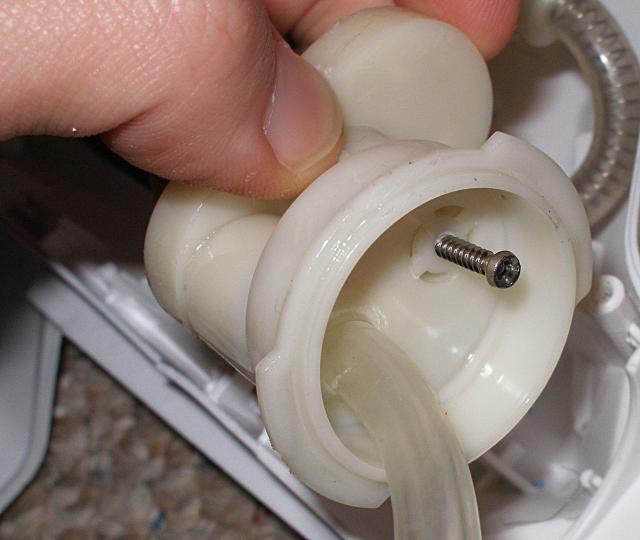
All you have to do is fill in the hole where the screw is. Remove the screw, wipe the area clean of any water, clean the area with some soap used to take care of grease (to eliminate the lubricant put on the O-ring of the reservoir), wipe the area free of any soap and water, wait for it to dry, sand the area with coarse sandpaper, and then fill it in. That is a much more simple procedure than the normal one.
Removing the valve and filling in the holes
To perform this part of the modification, you will need a hacksaw, a clamp, and epoxy or putty epoxy.
I put my CPS 2700's valve assembly in a clamp to prepare to remove the pressure relief valve.
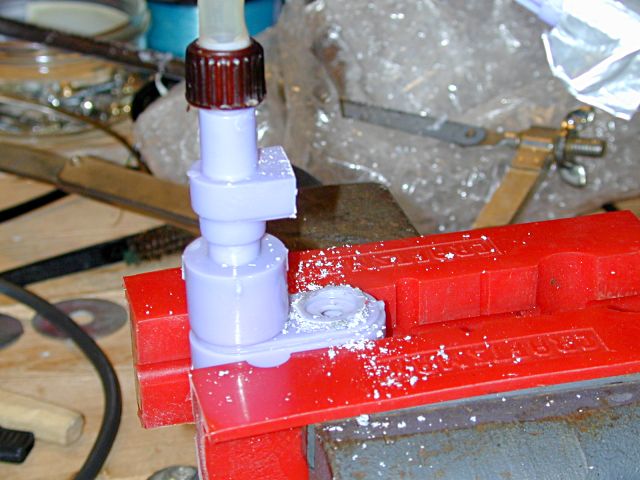
I used a hacksaw to cut off the valve area.
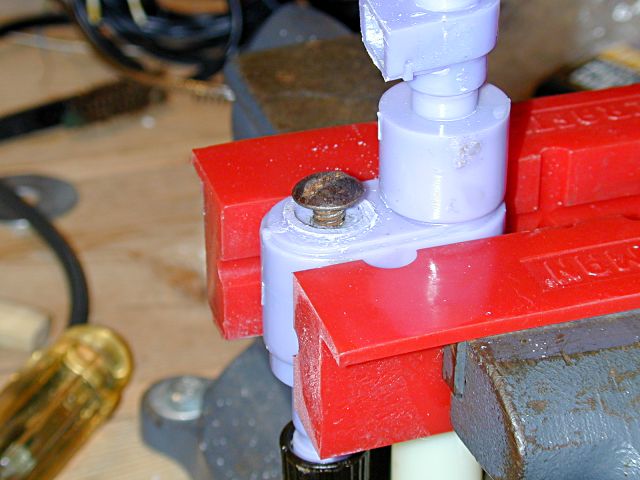
I found a screw that can thread into the hole to help fill in the hole. I thread the screw in a bit and apply some epoxy. On the other hole, I fill the entire hole with a lot of epoxy and cover it in electrical tape to keep it in. I would suggest using putty epoxy (also known as plumber's epoxy, or plumber's putty) on both holes as was done in the CPS 1200 type B valve image above rather than simple epoxy. Putty epoxy takes up space and seals completely solid, making it ideal for filling in the holes.
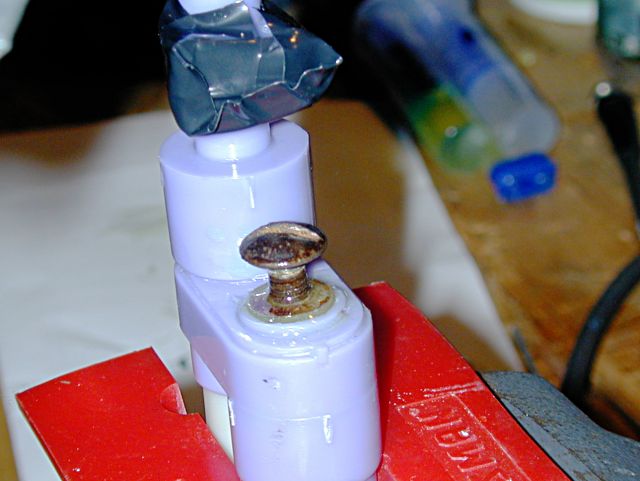
This image shows the valve with the epoxy on both holes. Give the epoxy the amount of time recommended to dry on the bottom.
After the modification, be careful to not over pump. If your pump gets rock solid, stop pumping immediately and pull the trigger. A pump getting hard is a sign of very high pressure and if you keep pumping, you will break your water gun. Again, remember that performing this modification is indeed removing a safety feature. These water guns were not designed to take the additional pressure.
Pressurized reservoir valve removal
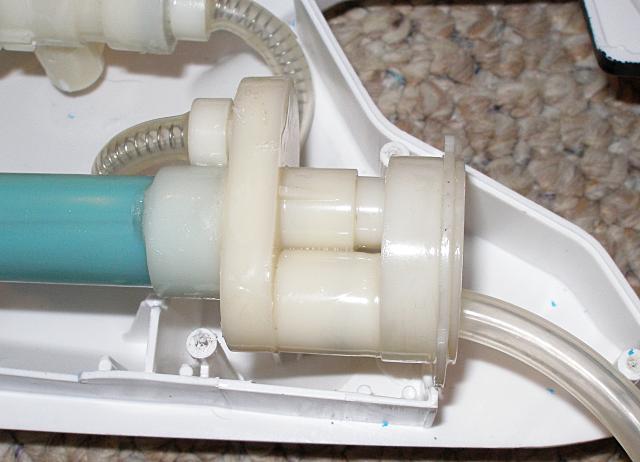
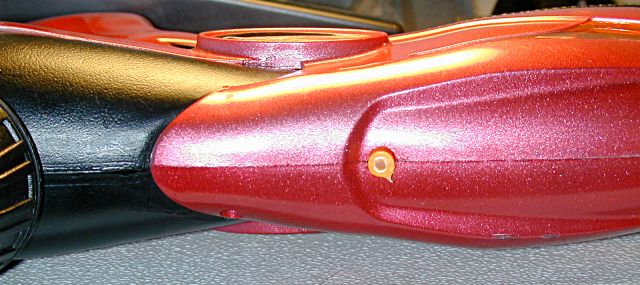
In pressurized reservoir water guns, air is pumped rather than water. The valve assembly for these guns then can be in the pump itself. Open your water gun and remove the pump. They are usually by the pump seal assembly like in the image below.

The outlet of the pressure relief valve is on the side of the pump as shown above. Filling that in can scratch up the pump shaft itself, so the inlet is what should be filled in.
Fill in the hole in the center of the pump above with epoxy. Let the epoxy dry for the amount of time recommended on the bottle and enjoy the upgrade.
Unlike water guns that pump water (separate PC water guns), pressurized reservoir guns pump air. Therefore, a few extra pumps will not result in a broken water gun given that the gun can handle the slight increase in pressure. By pumping water, an incompressible fluid, the water can eventually get to the point where it has nowhere to go. Air can be compressed, so by performing this modification you can increase the pressure of your water gun considerably without much fear of a break. With that being said, again, you are removing a safety feature, so breaks are more likely and if you continue to pump without regard for your water gun, it will break.
Storm valve removal
Sealing off the pressure relief valve of Storm water pistols is pretty simple. The valve is on the top of the pistol and it can be filled in with something as simple as hot glue. Storm water pistols are pressurized reservoir water guns, so all of the warnings for pressurized reservoir water guns mentioned above apply.