Piston conversion
Written by Ben
Last updated on 2007-12-16
I posted on the SSC forums about my modified Vaporizer, specifically about how I "[made] new internals for the Vaporizer." Later that year when more people started joining, some found that topic. Most of them were new to soakers and only had a handful of water guns. A few of these people asked me to make a guide for this modification. I thought that modifying guns like this is not very useful, especially for the younger people, due to rock solid pump. However, the modification was relatively straightforward and can be fun to toy with. The gun wasn't the best one for battles, but it was good for building those pumping muscles, and with practice it's fine.
Theory
The idea behind the modification was to add the parts a piston with an included reservoir was missing, the parts you could add to transform it into a separate PC gun. A piston with an included reservoir has a reservoir, pump and one check valve. All I had to add was another check valve, a PC and a firing valve to turn it into a separate PC gun. Simple, the problem was doing it so that it fit in and on the case. This in a way is a prelude to making homemade water guns, as it's a mod but also a homemade in many ways.
There's no real advantage to this modification aside from it being a fun project. If you want to create a water gun similar to Buzz Bee Toy's "Steady Stream," which is a piston water gun with a pressure chamber that exists to keep water output constant by storing a release it slower than it can be pumped, that is a possibility with this modification.
Materials
- Check valve (note that I used a homemade one, but I recommend buying one)
- Trigger valve of some sort (I used a ball valve)
- Something to make a nozzle out of (I used a
- Tubing, ect. to connect everything together
- Pressure Chamber (I used some latex rubber tubing)
Construction
The construction depend greatly on what gun you use. However, you can still follow this basic outline on most guns.
Open the gun up. Remove the internals.
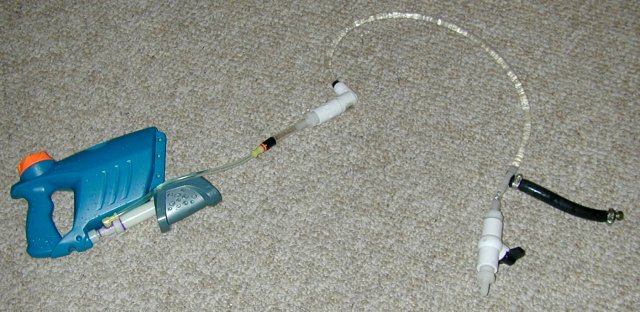
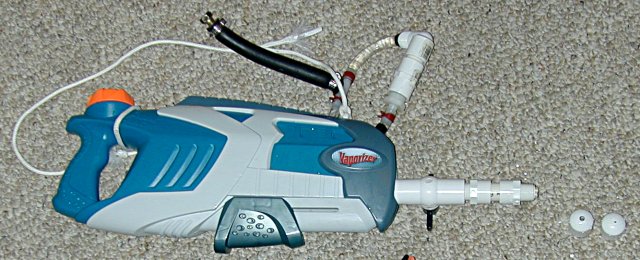
Hook up all the parts it's missing. Do not try to fit them into the case just yet. Note that in the picture there are no tubing clamps used yet. The order in the picture (from left to right) is Vaporizer, check valve, PC, firing valve, and nozzle. Remember to put the check valve in the correct direction (allowing flow into the pressure chamber, but not the other way), so that the water can flow into the PC but not back into the pump.
The gun will not work without the check valve. You might be able to get one or two pumps in, but the pump will be completely solid after that.
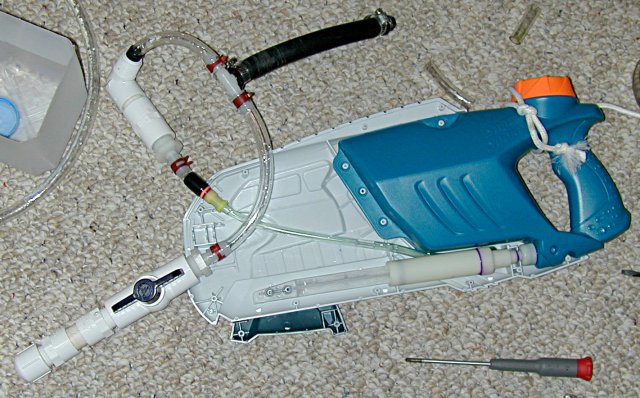
Put everything into the case. You may have to make the PC external like I did. In the picture, I forgot a single tubing clamp, it was the one above the original Vaporizer nozzle, firmly attaching the Vaporizer to the homemade parts.
Close the gun up. This may take some trial and error to figure out how to close the case over the new internals.
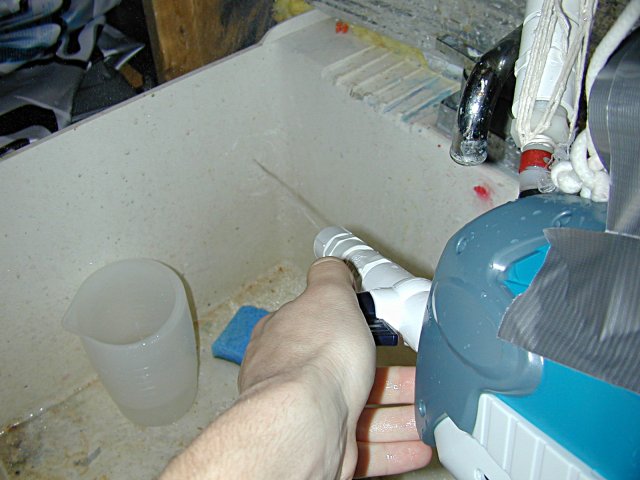
Test the gun. You want to make sure it works before doing more.
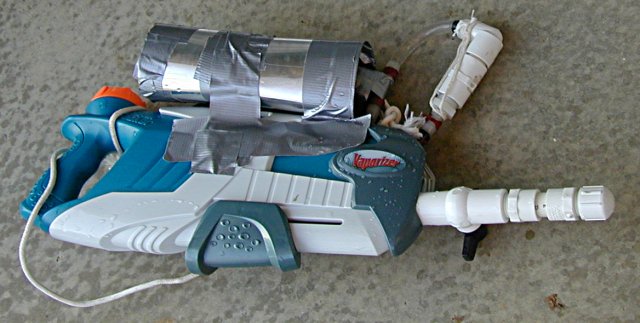
Modify the PC and put it in a case. While you don't have to modify the PC, if you want to now is the time to do it. I colossused my LRT with 5 layers of bike tubes. They had to be duct taped to stay on. You can see the duct tape in the last picture. I duct taped it to the tee and the bolt I used to close the open end of the LRT. The case was made from aluminum sheet. Remember to firmly attach the PC to the gun if it is external. You can see the duct tape I used to do that.
Test the gun again. You want to make sure nothing blows off or breaks after the PC modification.
The gun is complete now! You should know what I meant about hard pumping now. The pump can be very tiring on a piston modified like this. Remember that if you have any questions, the SSC forums are the place to ask.
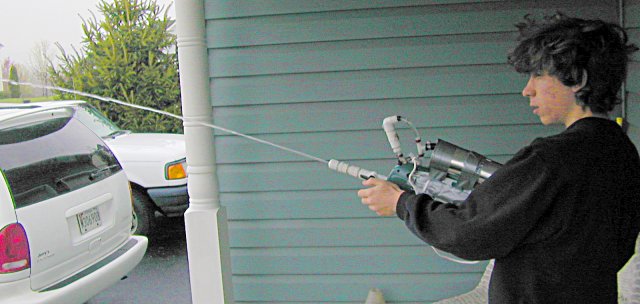
Image of the gun firing