PC expansion
Written by Ben
Last updated on 2008-01-20
PC expansion modifications increase the capacity of a pressure chamber. These modifications apply to all separate pressure chamber water guns, but mainly CPS ones. The theory on CPS water guns is that the case was designed to limit the expansion of the rubber tubing because tiny tears in the rubber happen as it expands. The rubber tubes expand inside of another plastic tube that has a diameter smaller than the full expansion diameter of the rubber tubing. Limiting the expansion prevents tears on the rubber. But, with already old PCs and PC replacement as an option now, limiting the expansion to extend the life of the bladders isn't necessary aside from maybe spherical CPS bladders, which can not be replaced with another spherical bladder.
But, some power modified water guns such as K-modded guns will have reduced capacity (and thus expansion) because of the extra rubber. So, doing a PC expansion modification to these water guns won't reduce the lifetime of the bladder unless it expands beyond where it originally did.
And you have to remember that these bladders weren't made to last forever. Expanding a little bit like they already do does make tiny tears in the rubber, which eventually will either cause it to have a hole or just be very weak.
Another advantage other than the capacity increases would be a power up. Like a rubber band, as the PC expands more, the pressure increases. However, lengthwise does not affect pressure, only changes in diameter do. So, PC expansion modifications on CPS water guns can result in a power up too.
Some of the options below are not fully developed, so if you would like to write a more detailed article with more pictures, please do! You can submit it to us here.
Spherical CPS
To expand a spherical CPS chamber, aside from replacing the chamber or removing the PC case, you have to stretch the chamber out somehow. Forum member King Soaker did this with a small propane torch. He heated the PC case one side at a time until the plastic started to soften and shrink. Then, he stretched it with a glass candy dish with leather gloves (because the plastic is about 400° F hot). He then let the PC case harden.
He also heated the sides of the frame to allow the enlarged PC to fit. Photos of the finished product are below.
The enlarged pressure chamber case and the pressure chamber are above.
The finished PC in the case is above. King Soaker reported an additional 275 mL of water in the PC and greater power after finishing this modification.
Cylindrical CPS
PC expansion of cylindrical pressure chambers involves replacing the PC case with a different, larger diameter one. The case might have to be modified slightly to fit the larger diameter cylinder, but other than that this is a straightforward modification.
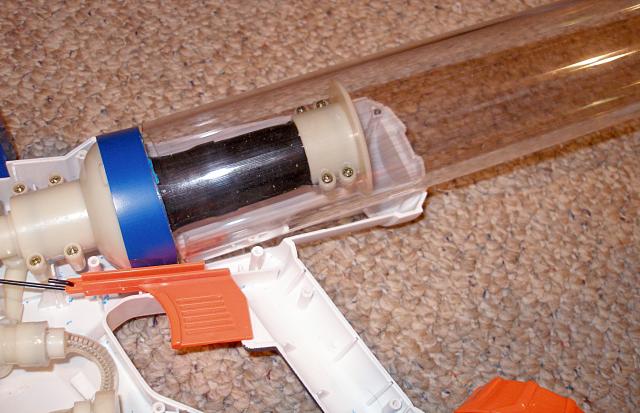
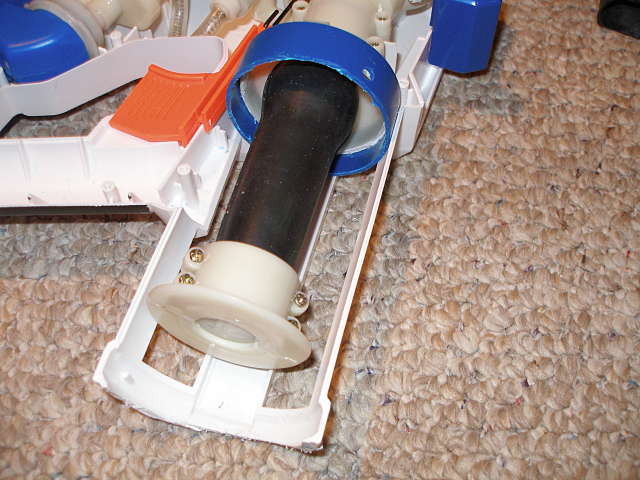
The image above shows a CPS chamber in it's cylindrical shaped case.
Saw off the end like in the image above and unclamp the clamp keeping it on the other end. You can then replace the PC case with something different. Cardboard cylinders are sold at stores like Staples, but cardboard is a poor choice for something that will likely get wet. The best thing to do is to find a cheap plastic tube of the diameter you want from McMaster-Carr.
Another thing you can do to expand PC capacity is to cut the rubber PC short. While that may seem counterintuitive, the PC hits the end of the case due to dead space in it in many water guns. Therefore, cutting the PC short will reduce the dead space that can then turn into water space. Post at our forums if you intend to do this modification because we do not have any sort of detailed guide on it.
Arctic Blast and Flash Flood
Due to the designs of these water guns, you have a few options. You can remove the PC case and do nothing else, getting a little bit of extra capacity. You can cut the PC case out completely and let the PC expand freely. Those options leave the PC open to being damaged by anything and don't look as cool as the third option I am doing.
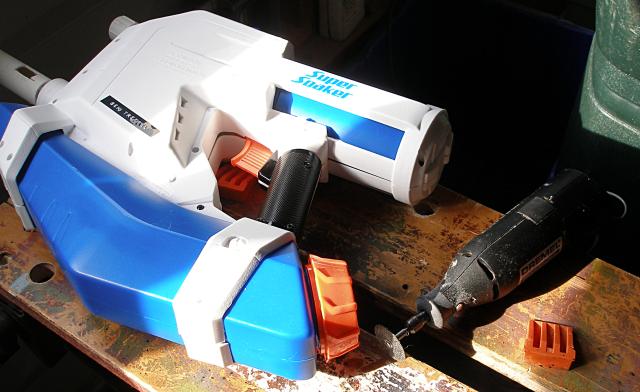
For this repair you will need 6 inchs to 1 foot (depending on how you want it to look) of 2.5 inch ID PETG tubing (McMaster-Carr part number 9245K57), a hacksaw, a drill (a drill press or hand drill are both fine), and possibly a dremel.
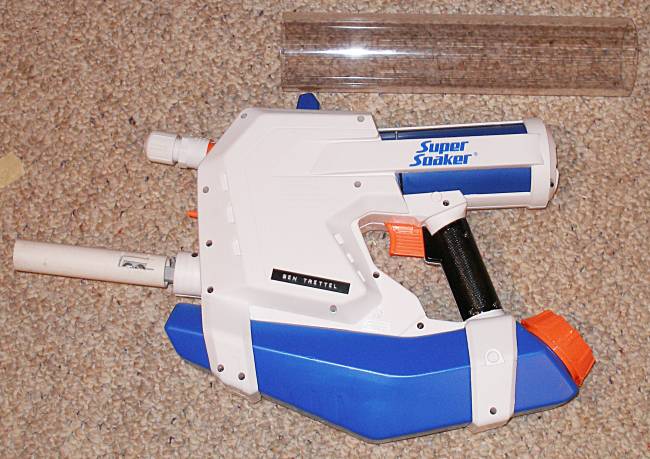
I am going to replace the small blue PC case with a much longer pipe the same diameter and wall thickness. The pipe is made of PETG, a clear, light, and strong plastic. The PC of the Arctic Blast and many other water guns actually can expand much longer than they do in their normal case, so with a new PC case, the full expansion can be achieved. Another advantage of getting full expansion is a slight increase in pressure, but in this case, expanding by length has less of an increase in pressure than expanding by diameter would. The new designs can't expand the PC case in diameter due to size restrictions, but much more water can be put into the chamber by using a longer tube.
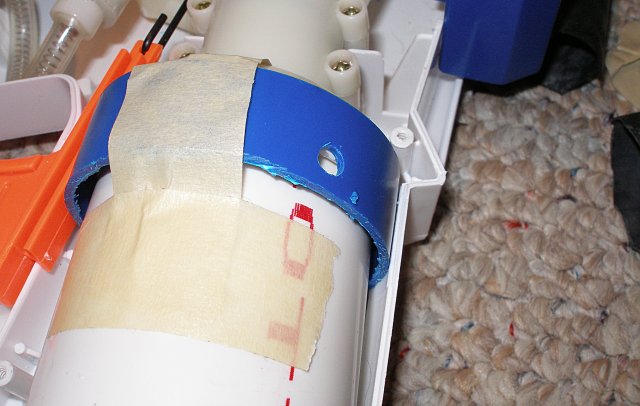
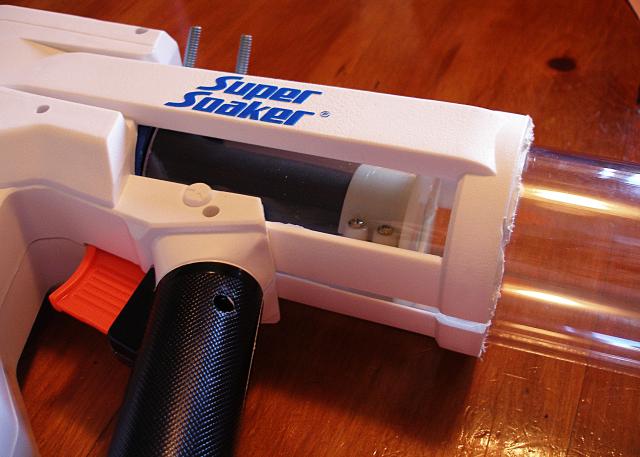
The photo above shows a problem. The end of the Arctic Blast's case is in the way of the pipe.
If you haven't already, remove the PC case from the water gun. You can read how to in the Colossus page.
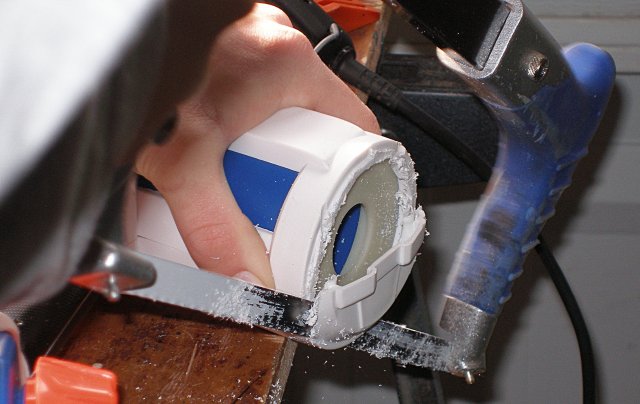
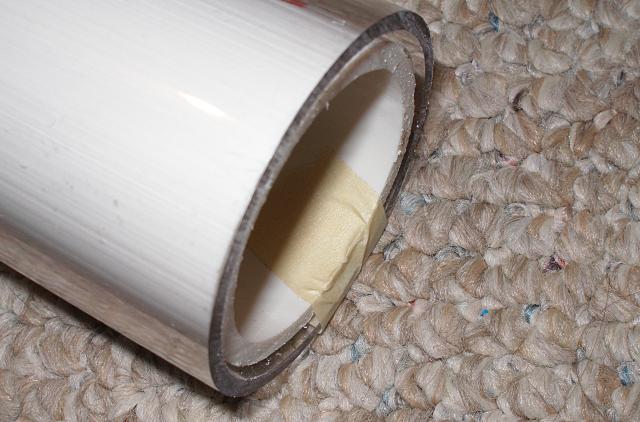
The problem is solved by cutting the end off. Using a dremel or simple hacksaw, you can cut the end of the case off. Keep the old PC case on to prevent harming the rubber bladder and start cutting away the part of the case where it starts curving.
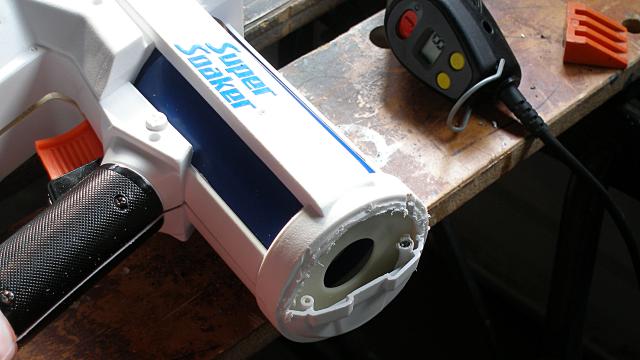
I've cut the top part off with a dremel. The bottom is best cut off with a hacksaw.
So I cut through it.
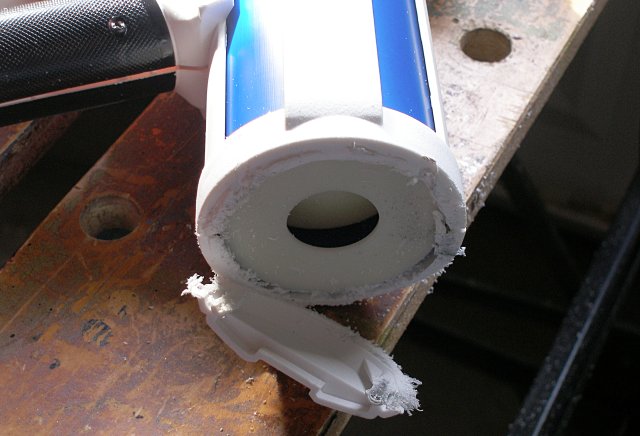
You eventually get to the point where you can just tear the plastic piece off. Using a small knife like a pocket knife or an X-acto knife, clean off all the burrs and dust off all the little plastic bits that are all of the inside of the gun now.
Now I am going to attach the PETG tube with a small bridge that screws on. To do that I have to drill a few holes. Scroll down to see the finished product if you are confused about what I am doing.
You have to remove the clamp on the end of the rubber bladder to stick the two inch PVC piece I used above in place. Read how to remove the clamp in the Colossus guide.
You don't have to attach the PETG like I did if you don't want to. You can simply tape it on. I wanted a better looking and more permanent solution.
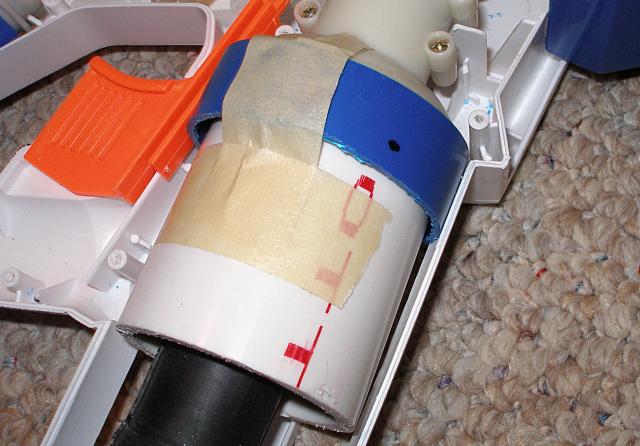
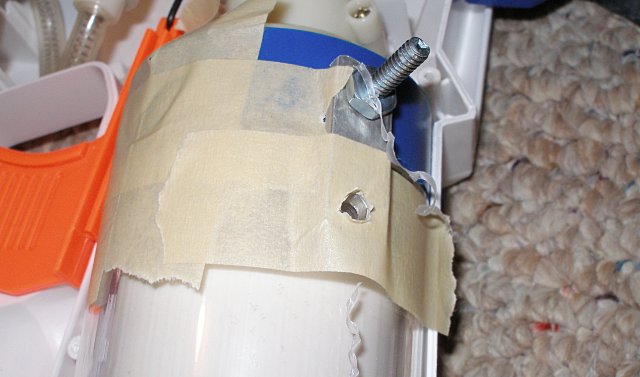
You don't want to drill a hole in the rubber bladder, so put something like a piece of PVC pipe in the way to stop that. I taped the pipe in place.
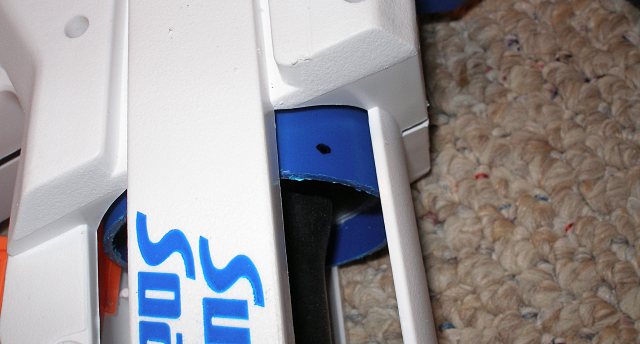
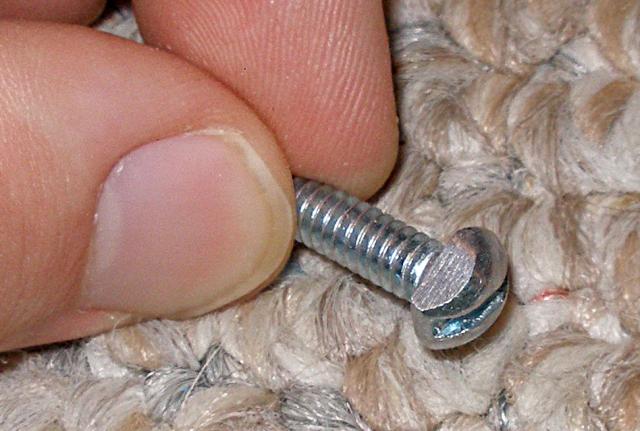
Above is the hole I drilled. I used #10-24 screws later, which have about a 3/16 inch diameter, so I used a 3/16 inch drill bit.
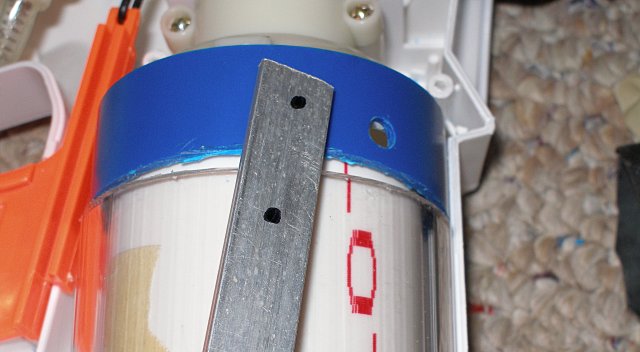
Now I am going to make the bridge piece. I put two dots on a small piece of aluminum where I want to drill. I figured out where to drill by simulating how the piece of aluminum will be attached to the pipes by placing it on the pipe. Scroll down to see the finished product to see how to place the aluminum.
Drill the two holes in the aluminum and then cut the piece of aluminum short like in the pictures below.
I taped the same piece of two inch PVC inside of the PETG tubing to protect the rubber bladder again.
I threaded the screw on with the bridge piece there. Then I put the case over the entire thing to make sure it fit correctly. It does.
Above shows how I had everything taped together. I wanted the PETG pipe to be flush against the old plastic pipe, so I taped the PETG to the pipe. I then drilled through the PETG using the aluminum as a guide.
Reattach the clamp at the end of the bladder.
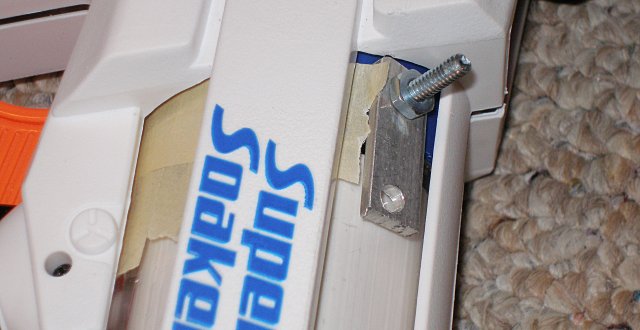
I had trouble getting a screw in straight because one side the the screw was overlapping some other plastic piece (I would take a picture, but the camera can't get the right angle). So, I used a grinding bit on a drill to flatten out one side so it will fit. You can use a file or a grinding bit on a dremel if you want to.
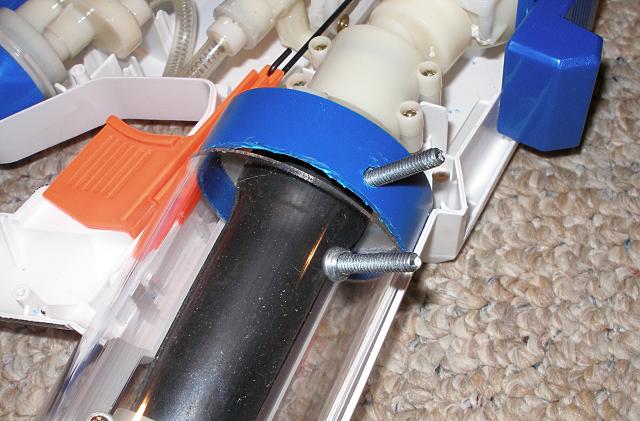
Put the screws in the holes and put the two tubes next to each other.
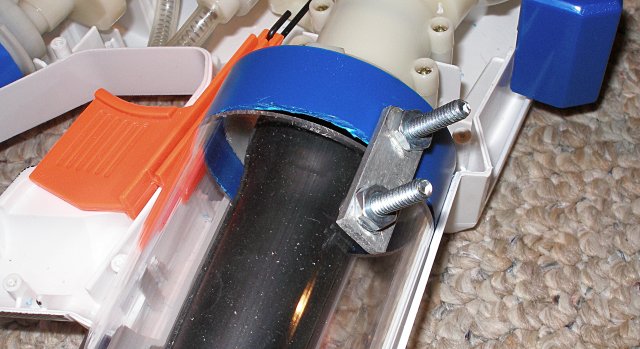
Put the bridge on and screw the screws on.
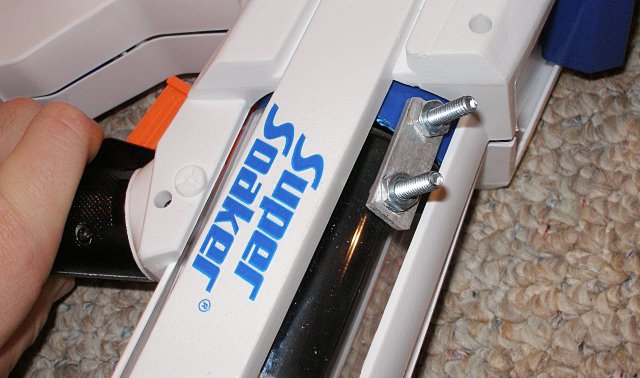
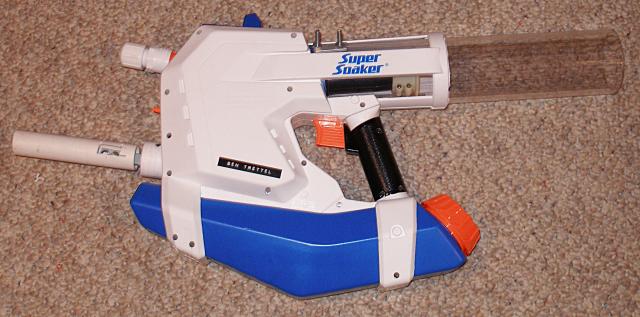
The image above and the few below are of the completed modification. It would be a good idea to cover up the end of the pipe with something like a mesh screen attached with screws to prevent the PC from possibly shooting off and hurting yourself.
You might want to cut the chamber short at this point if you want a smaller water gun because the PC won't expand much beyond the outside of the original case. Don't pump more than about 35 times with this modification. The pressure chamber will run very close to being completely full beyond that point, and you could pop it.

Separate PC air pressure
For separate PC air pressure water guns, all you can do is remove the pressure chambers and replace them with something else that is larger. Sometimes you can do a PC swap, for example, putting an SS 300's PCs in an XP 150. Most XP/Max-D water guns have the same sized PC attachment from what I know.
When you can't swap pressure chambers, you have to remove the old pressure chambers and epoxy on something else. For example, you can epoxy 1 liter bottles where the old pressure chambers were. Just be sure to get bottles that likely have some pressure rating like soda bottles, and if you do use soda bottles, be sure to wash them out sufficiently and wait for them to dry before applying epoxy. Once you have the bottles ready, sand the areas where you want to apply epoxy and apply the epoxy. It might be a good idea to use putty epoxy (a solid, gum-like epoxy) for this because it has some sort of volume that can go around the entire connector.