Build Log: Supercannon
Written by Ben
Last updated on 2008-04-27
- Overview by Drenchenator
- Forum Posts
- Super Soaker Central Forums, October 9th, 2005
- Super Soaker Central Forums, October 10th, 2005
- Super Soaker Central Forums, October 11th, 2005
- Super Soaker Central Forums, October 13th, 2005
- SoakerMedia Forums, October 14th, 2005
- SoakerMedia Forums, October 15th, 2005
- Super Soaker Central Forums, October 18th, 2005
- SoakerMedia Forums, October 18th, 2005
- Photos
- Links
Overview by Drenchenator
 Supercannon was Ben's first attempt at a true water cannon—a water gun designed for performance. The design predates Ben's second water cannon, Supercannon II, yet pioneered the overall idea. They share the same internal diameter—1 1/2"—and both sported the famous big red fire hose nozzle; the firing valve setup was identical and introduced the omnipresent torque arm to homemade water guns. Yet no one remembers the original Supercannon! What went wrong?
The idea behind the gun was that air rises to the top; water falls below. This is a standard principle in air pressure water gun design. Supercannon attempted to take advantage of this while still maintaining some laminar flow. A long 1 1/2" PVC pipe was pushed through a bushing to create a long straw into a large 4" PVC pipe serving as the pressurized reservoir. When you tilt the gun up, the air floats to the top; the water goes to the bottom—but this time around, it has a path to exit, up through the straw to the firing valve. The air could now push the water out of the gun through the straw. Technically, water in the straw traveled in a straight path, laminating the stream to a certain degree.
The end of the gun had a large clean-out fitting to fill the gun with water. Pressurization was done with a special nozzle. Both of these were major problems with the gun. The screw-on cap was very hard to unscrew, even using tools to help. Once the gun was pressurized, water leaked from the end. The filling nozzle was very hard to use—specifically it leaked during filling and was hard to remove. We had to close the firing valve and then unscrew the filling nozzle—while the air in the nozzle was technically still pressurized!
Despite these problems, we tested gun. It shot about at least 50 feet on the 1/2" conical fire hose nozzle. After a few shots we couldn't get the filling nozzle off initially and had to wait to remove it. At this point Ben and I pretty much gave up on the gun.
As a water cannon, the gun failed. But it pointed out many problems that we fixed in Supercannon II and SuperCAP. In SuperCAP, filling was done through a 1" ball valve—something that won't leak and can be opened and closed quickly and easily. Supercannon II was filled with water through the firing valve and pressurized through the other end, the opposite setup of the original Supercannon. Supercannon relied on too many assumptions; Supercannon II was far more direct and thus performed much better than any water gun before it.
Super Soaker Central Forums, October 9th, 2005
This morning after looking through the boxes in my workshop, I've decided to make the most powerful water gun we've seen yet. Of course, I do plan on not making it perfect by anyone's standards, just designed purely for performance and made from very common and cheap parts. There would be no fun if there was no room for improvement too! That and my wallet sure isn't big enough to support the best of today's technology.
I went out to Lowes and bought everything except for a few parts that I had and the 4 inch pressure-rated pipe. I will buy the 4 inch pipe off McMaster-Carr simply because the only place to get pressure-rated pipe around where I live doesn't carry it all the time. I will be buying another part, but it is not required for construction. A fire hose nozzle would be a great thing to have however, given that it has a conical design which is better for the stream.
My plan at the moment is to build the parts that I can before I get the pressure-rated pipe. Once the pressure-rated comes in, all I'd have to do then is cement the pipe on, which shouldn't take long at all.
Also, for those who would consider using this homemade water gun in a battle, this water gun is designed strictly for performance, not battle-usability! This homemade water gun wouldn't be a bad choice for a battle on a smaller nozzle, but it would be hard to carry without a strap and only have one shot per tank with a long time between shots (due to the air compressor that must be used to pressurize it). This water gun is not meant to be fired towards people at full power.
I've planned making a water gun like this for over a year. It's time that I actually got to making this water gun, probably the first of many with a strictly performance-oriented water gun design. I think it would be a neat bragging point to say "Super Soaker Central: Home of the world's most powerful water gun."
Super Soaker Central Forums, October 10th, 2005
Yesterday I finished up the two most important parts of this design: the special nozzle that must be attached to pressurize and a specially modified ball valve, modified to make use easier. As you can see in the image below, I am getting much more leverage than I was before:
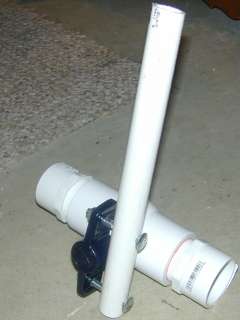
This actually makes this large valve fairly easy to open and close and I plan to modify some of my other valves similarly.
While at the store, I considered buying a brass ball valve simply because it would be easier to turn. Now this appears to be an excellent deal because it cost far less than half the price total and the valve is easier to turn than the brass valve to begin with.
Also, the image is fairly distorted for one reason or another. While the PVC pipe I used is fairly long, it's not over a foot as it appears to be in the picture. I almost wish it was because the fire hose nozzle I ordered was 10 inches long and my nozzle chamber is about 8 inches long. The handle would seem short it seems...
Today I ordered two conical nozzles (one 3/4" and one 1 1/2"). I also ordered my 4 inch pressure-rated pipe and 1 gallon of glycerin, the latter being very expensive. I don't plan on buying another gallon any time soon, given that one gallon is good for at least 20 gallons of water. I now can afford to have substantially improved range in every battle I go to. Of course, I will be asking everyone before use knowing that there's always those who would believe this stuff is either unfair or unsafe. To me, the concerns about it being unsafe are mostly worthless given that this glycerin is diluted when I get it, I dilute it further, and glycerin is used in many foods (just check the ingredients if you don't believe me).
The plan at the moment is to make a modest guide with videos of the water gun in action and maybe some of the finalization of the construction. This guide will not be step-by-step simply because I don't want incompetent people using a water cannon of such potential. I also plan on using every bit of the 5 feet of pressure-rated 4 inch pipe I bought, which will make this water gun a serious cannon in every respect.
Super Soaker Central Forums, October 11th, 2005
The 4 inch pipe and glycerine came in today. I also ordered a new nozzle for my APH's (reducing/tapered/conical design). The nozzle I ordered for this water gun was sent the same day, but apparently was at another warehouse. I'd expect that to come in later this week. McMaster is located in New Jersey, which explains the fast shipping, but I do not know where the other warehouse is located.
The glycerin I ordered suggested checking out the MSDS (Material Safety Data Sheet). This dispells all thoughts that this is unsafe to me. When diluted as much as I will dilute it, this should essentially be as safe as regular water. I intend on doing a study into how much glycerin makes the largest difference. My guess is that a graph of glycerin concentration vs. range will follow a graph similar to 1/x, and I can find the point where your glycerin will increase your range the most substantially with the least concentration using simple Calculus.
The end of this brass nozzle I received doesn't seem to be very clean. It appears that I will have to drill out a larger size to use this nozzle at it's peak. I'll take a picture of this for the updated Water nozzle and stream physics article to warn people to watch out for this.
I have to study for some tests tonight, so I will not be finishing this water gun until tommorow. If I finish studying, I will modify one part to allow pipe to pass straight through it and then call it a day.
Super Soaker Central Forums, October 13th, 2005
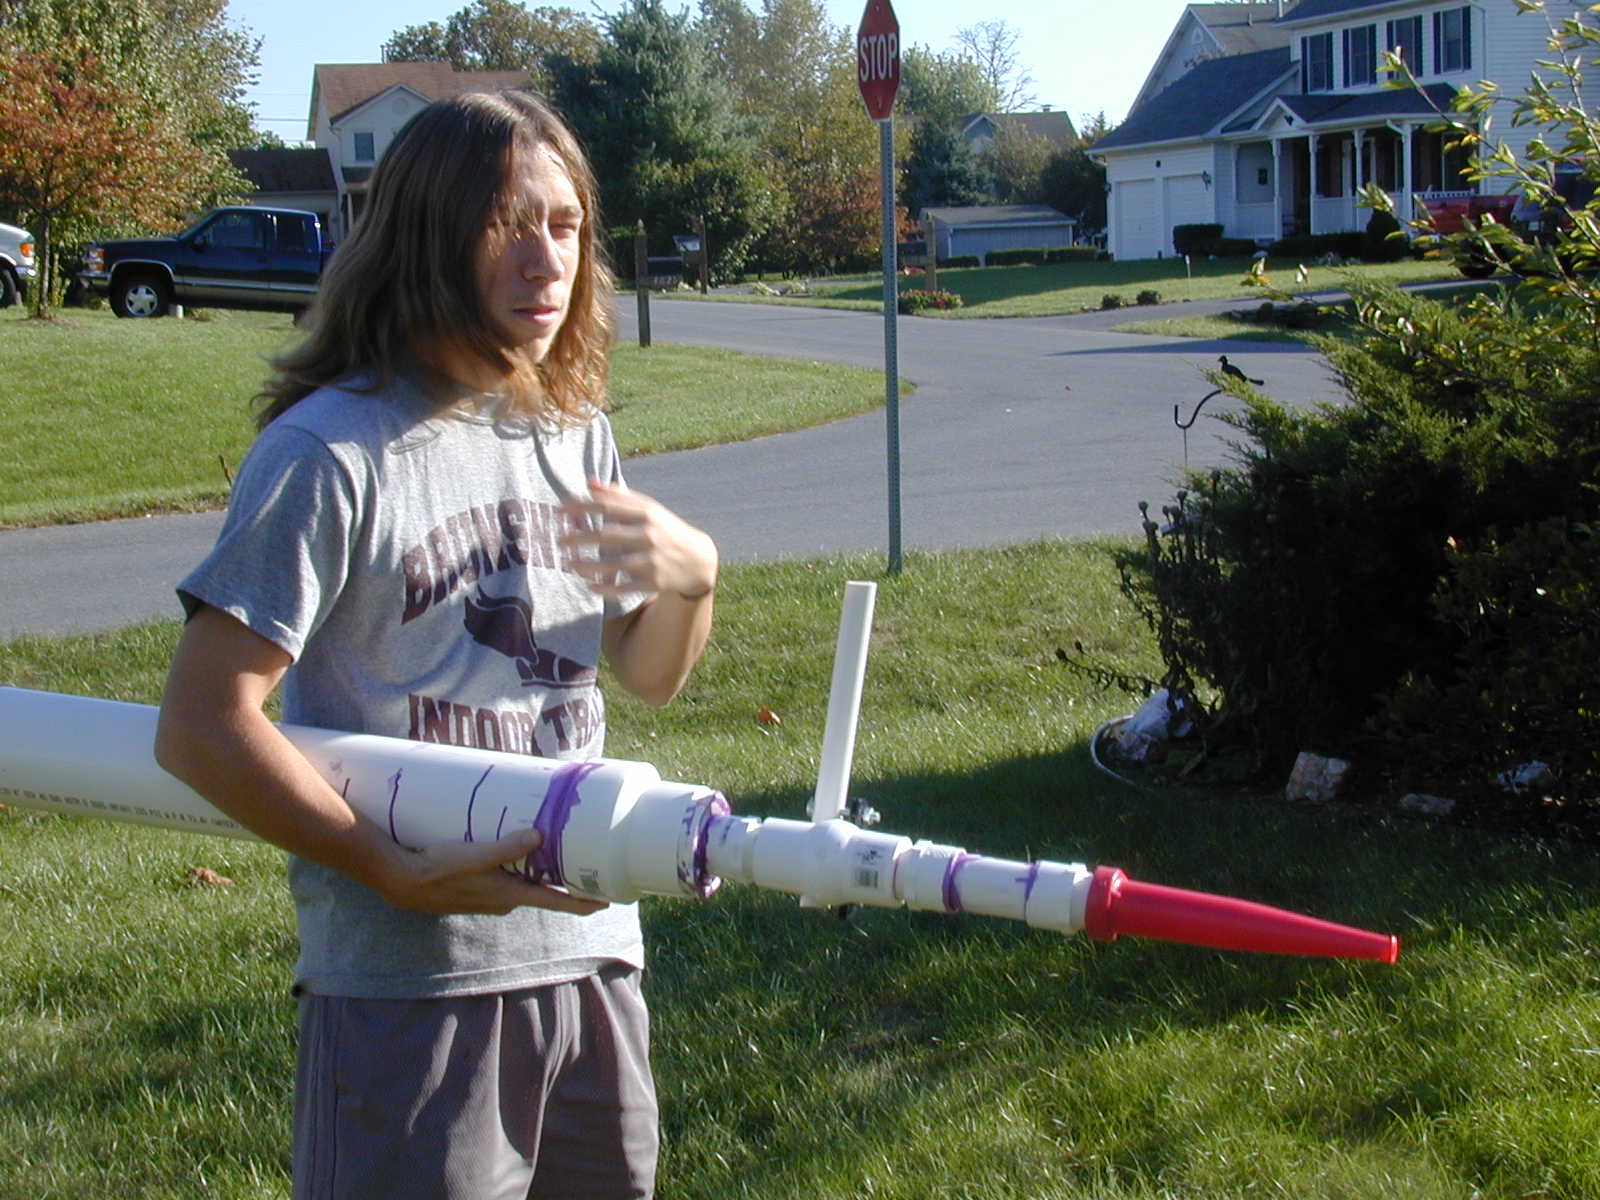
I finished constructing the one modified PVC piece that I will need to make this cannon. However, during the modification I found out that the construction would be easier and better if I bought another coupler. Today I may be able to get the coupler, but I do not know for sure if I will be able to.
I also cut the 4 inch pipe to 2 1/2 feet long. The cut makes this gun far easier to carry empty and I can use the other 2 1/2 feet I have to make another gun.
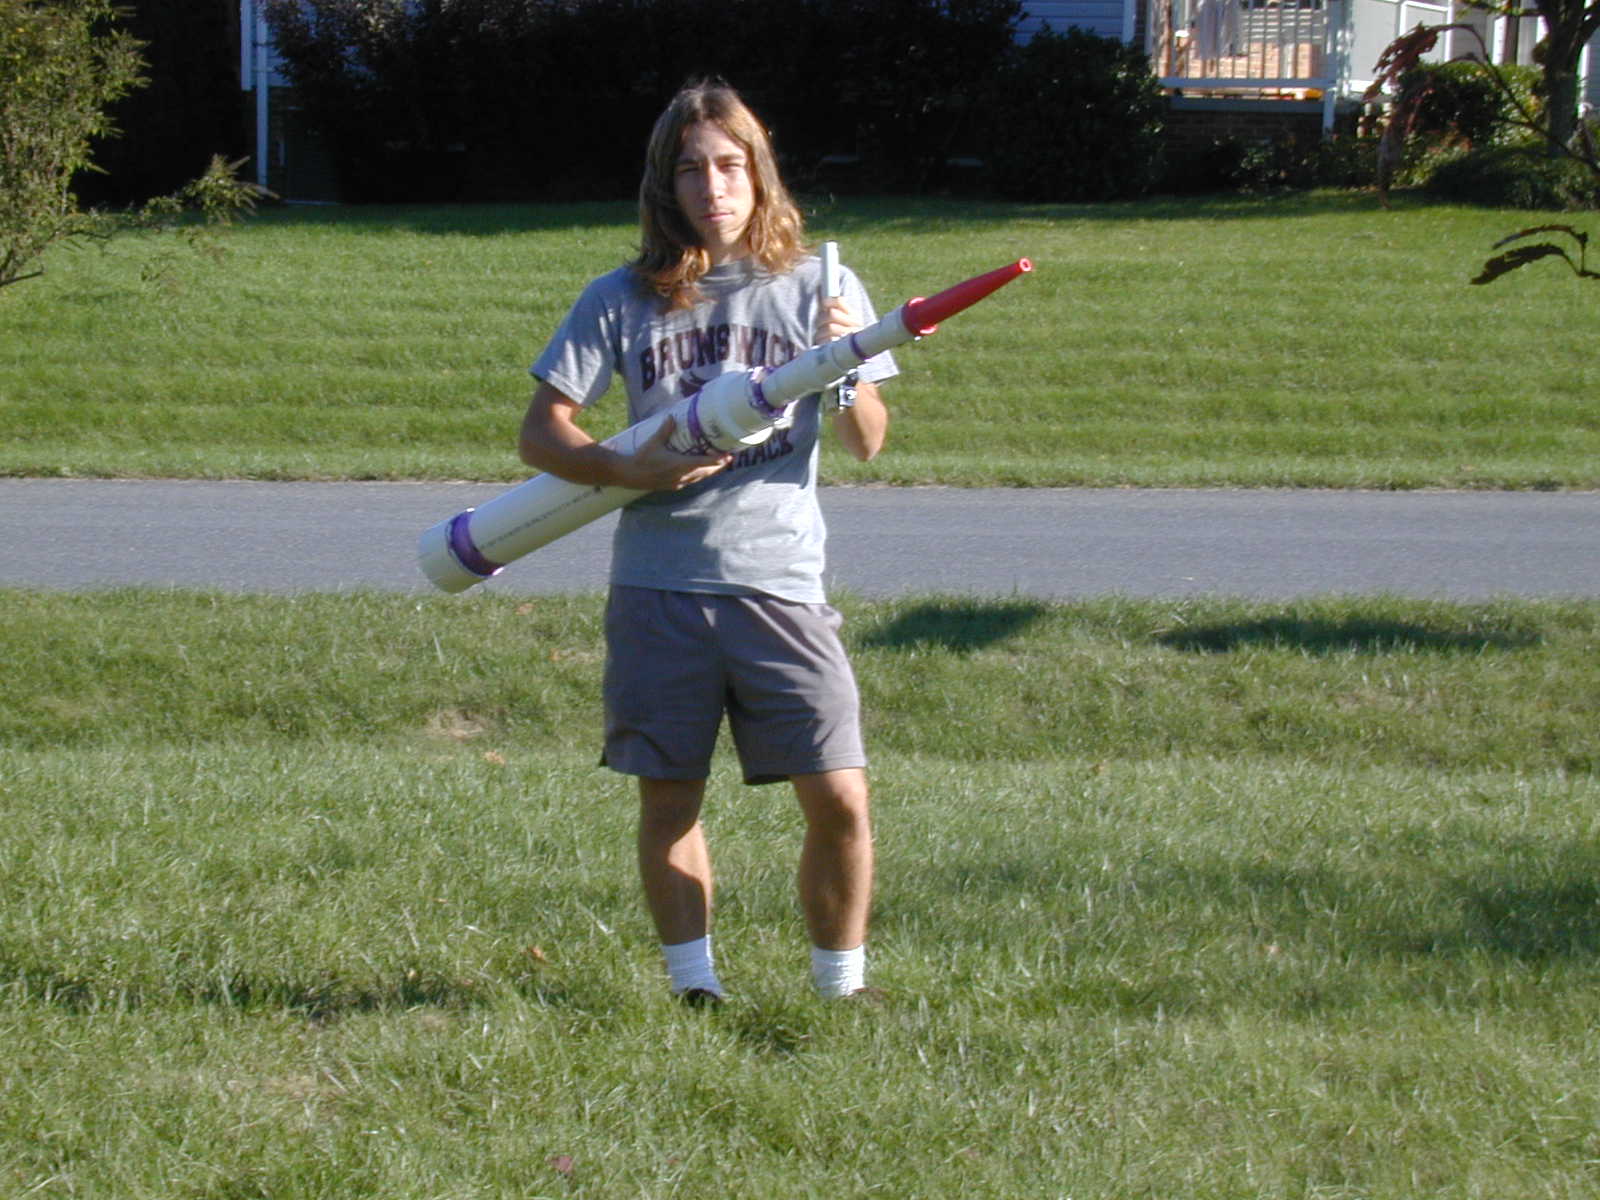
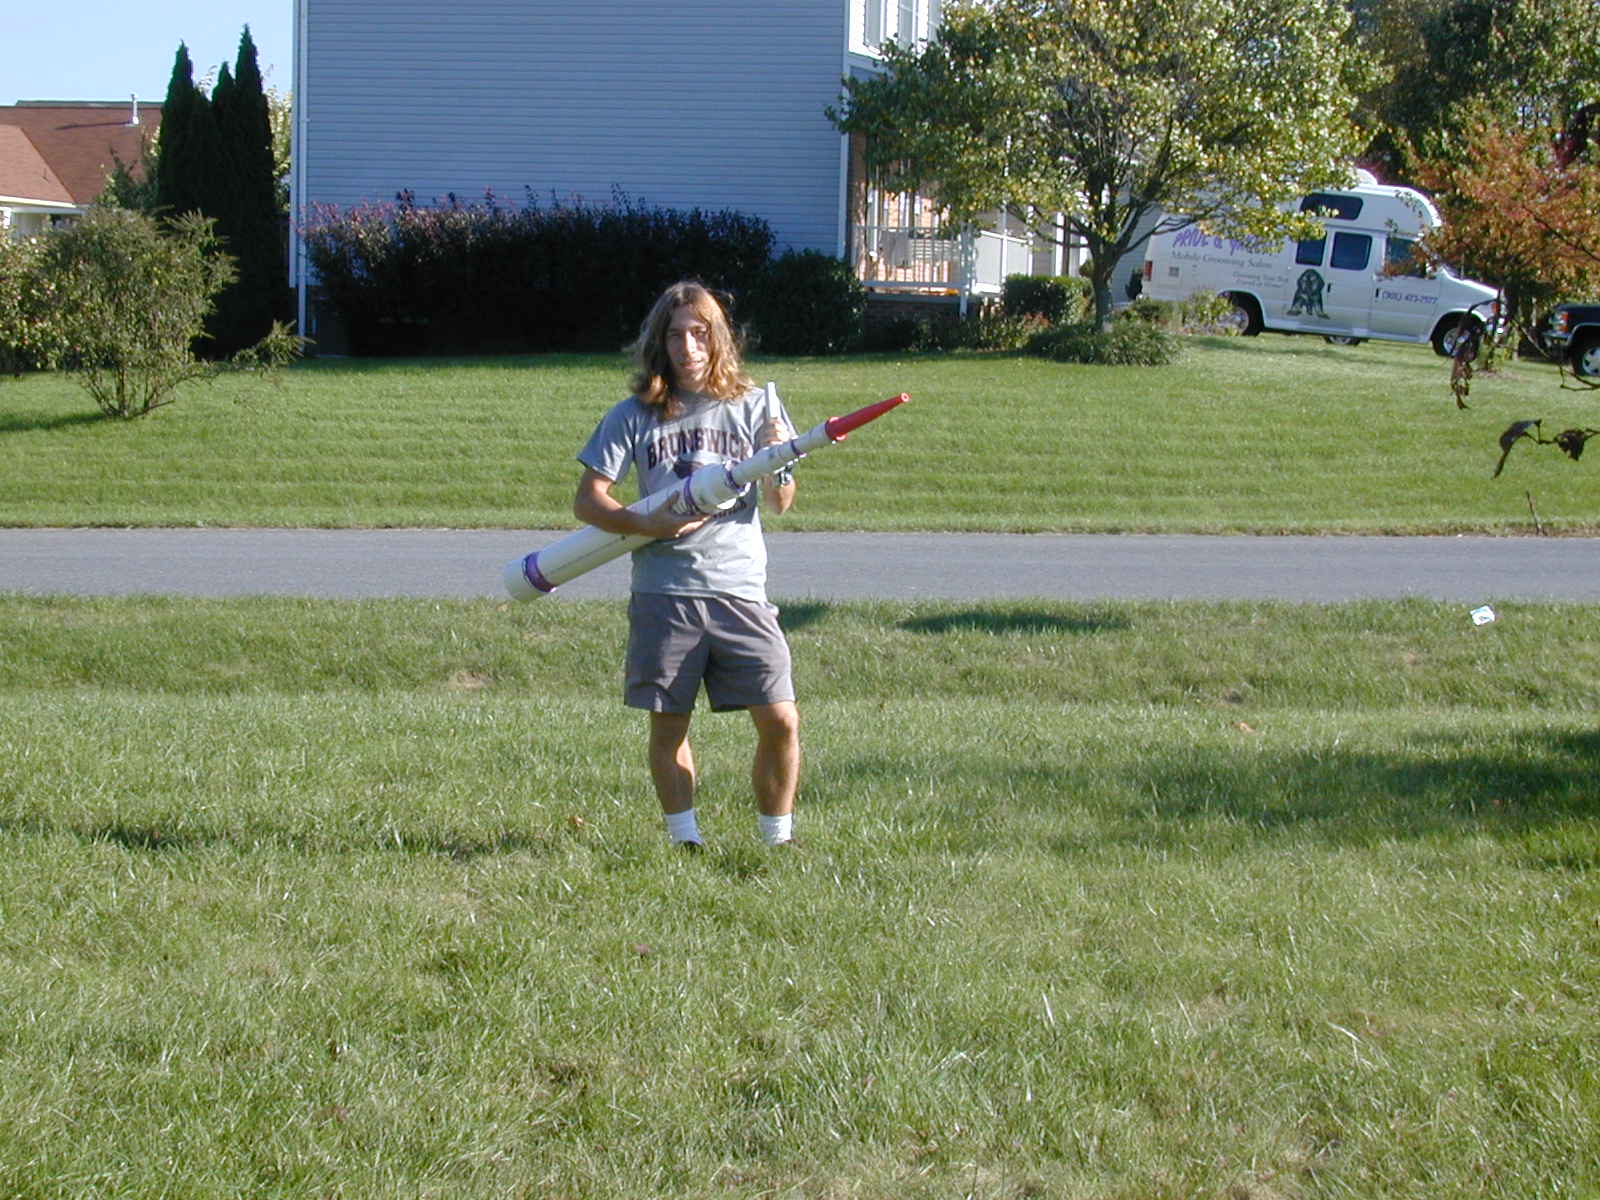
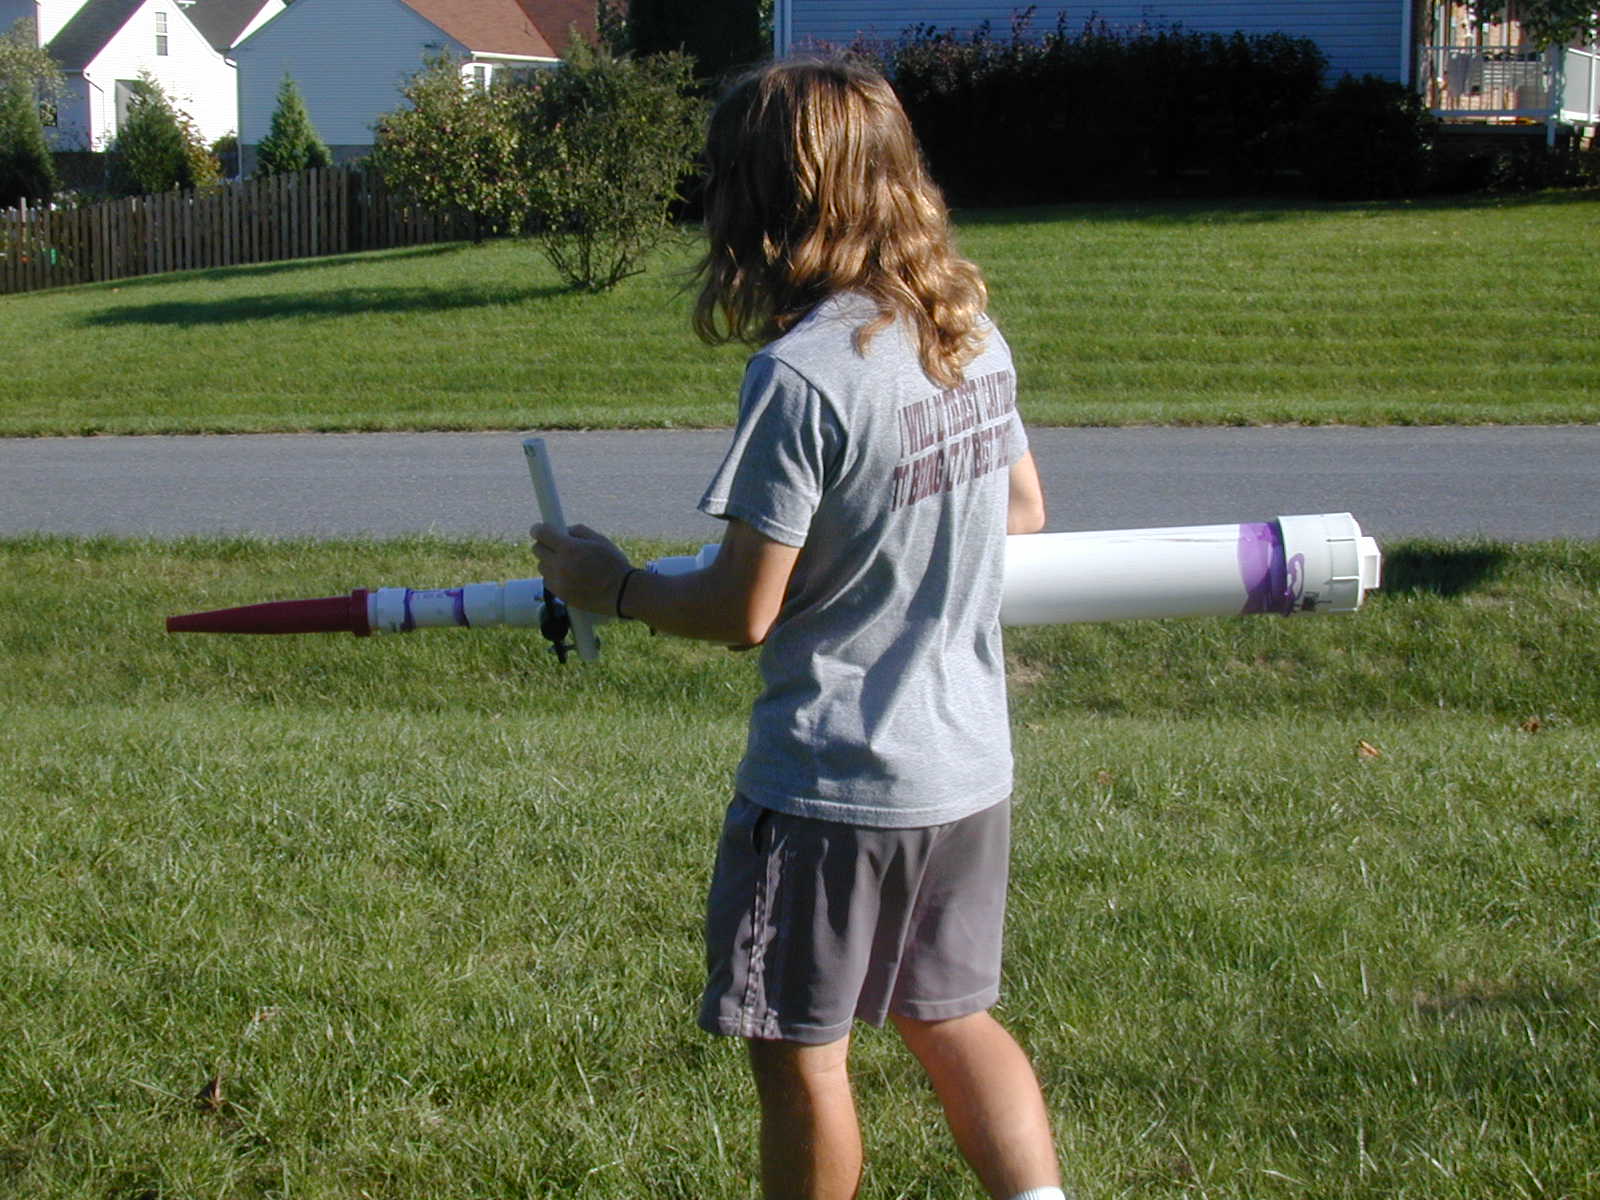
For fun, I make a mock assemblage of the gun and walked around with it. Needless to say, the gun appeared frightening at best. My brother was very sick and could not have taken a picture of me walking around, so I took some pictures of the gun itself lying on the ground. The total length is about 5 feet. The red nozzle is a cheap plastic fire hose nozzle I ordered from McMaster-Carr.
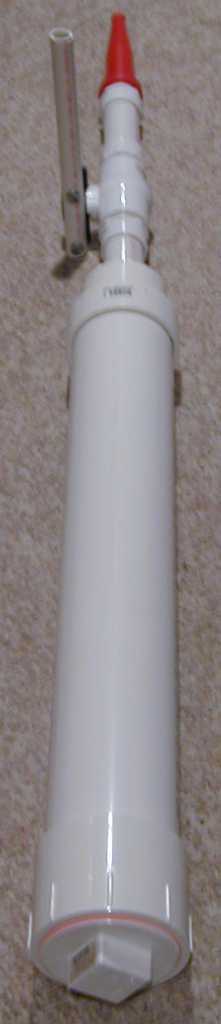 | 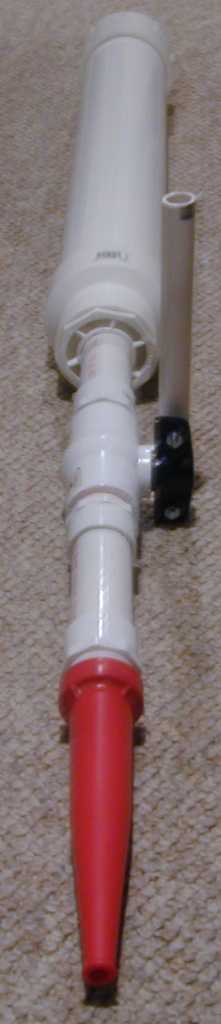 |
The images are slightly blurry due to last night's lack of light. If I used a flash, the image would appear dark because the flash did not have a very good range, so I had to take the picture without a flash at about 1/4 of a second.
SoakerMedia Forums, October 14th, 2005
Pressurization is done through a special nozzle. I've added some extra pressure to my APH's before with a small piece like this. My WBL is pressurized using a similar method, though it's not a nozzle (but can be removed similarly).
I choose this method of pressurization for a simple reason: there is less to carry on the field and there also is less to break on the field. The pressurization part is fairly large because I used a check valve and a special adaptor to pressurize this like an air-powered tool. This gets a better seal than traditional shrader valves and was actually cheaper.
This design is made to be upgradable and completely repairable too. I used a threaded ball valve to allow for it to be replaced if it breaks. The hole where pressurization is done also allows for checking of the internals. If one pipe fitting breaks, I can saw off right before and replace the affected parts. This design is made to be easy and cheap to repair because at high pressures parts are far more likely to be broken.
SoakerMedia Forums, October 15th, 2005
I was wondering when someone would notice that the water doesn't float on top. The modified PVC fitting I was talking about was a reducer modified to have the pipe pass straight through it. This will allow me to feed from the water at the bottom. I first considered a piston, but I will try that method in a later design. This is easier and less expensive at the moment.
This should not affect stream lamination because it travels in a straight path to the nozzle. The water should drop down and then once it is low enough, almost be sucked up the intake pipe. In theory one may think this design will not be as effective as a design with a piston, but the long length of pipe will provide for an extreme amount of flow straightening. My nozzle also is of a conical design, a first for a homemade water gun, which will reduce turbulance at the nozzle.
Right now I am considering using a piston in my next one of this design. I'll make them nearly identical except for the piston and we'll see how they perform side-by-side.
Super Soaker Central Forums, October 18th, 2005
Yesterday and today I conducted some tests of the "completed" cannon. From these tests, it is obvious that I am not complete yet. Power is good, in fact, I would say without any doubt that this is the most powerful water gun I have shot yet. However, reliability is not very good. The back-loading system I created leaks terrible - this is the cause of most of the problems. It also is hard, if not impossible, to remove the water from the chamber after a shot because getting the large 4 inch threaded cap off is simply impossible at this point. Pouring the water out can not be done because of the pipe going down the center.
I'm considering upgrading this system to correct these problems. At the suggestion of my brother, I plan on adding the filling parts in the center as opposed to the end. The end parts will be removed and capped off.
After this, I intend on making the simple air-pressure piston (APP as opposed to hand-powered pistons?) version of this cannon. This will not include the hydraulic leverage feature I spoke of at SM. This will only be a simple cannon, nearly in the style of MrPukeOnYourHead's water guns, except that it is far larger and far more powerful.
SoakerMedia Forums, October 18th, 2005
I didn't measure distance, but my brother did tell me how far it appeared to have shot. I used the big read 1/2" nozzle that I had bought, and due to the nozzle size, a mist was created upon the shot, making it hard to see where I shot. The second shot we did, which I believe was at 60 PSI approximately, shot completely down our driveway (according to my brother who did some measurements, the driveway is over 50 feet long). We prepared for one 100 PSI shot, but the air compressor attachment was attached far too hard to the nozzle and we couldn't get it off. We had a similar problem with an 80 PSI shot before that, but we were able to get the attachment off before too much pressure was lost due to leaking.
I would suggest to those interested in making a powerful water cannon to wait for the results of my second cannon. The air-pressure piston brother of this cannon should culminate new experiences gained from the creation of this most recent cannon and theoretically superior design.
This is very much how I expected building homemade water guns was when I started. I thought that I would have to make one, improve, and then make another one, maybe several times until I was satisfied. This water gun can be used and I won't be getting rid of it, but it should be pale in comparison to it's piston brother.
Also in the piston version I plan on making the pressurization device built in to the gun. I thought that having a nozzle-based pressurization device would be useful, but it turned out to be a pain on a larger cannon such as this. Removal is hard due to the large size of pipe used.
Photos
 |  |  |  |